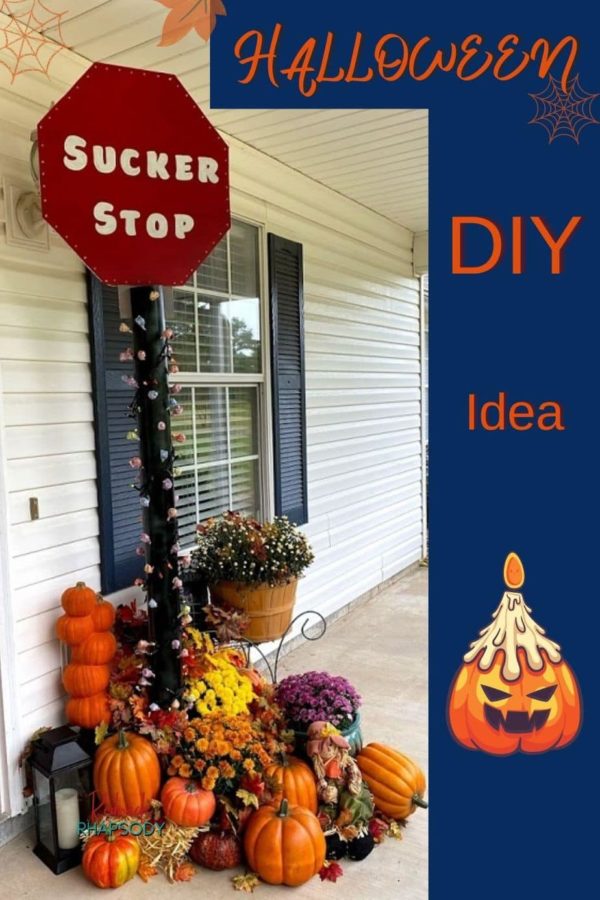
This DIY Sucker Pole is such an easy project, as well as a great way to decorate your porch. What arrangements have you made to offer a safe way for children to Trick or Treat your home this year? If you haven’t then this idea of a Halloween Social Safe Sucker pole may be just this solution! It gets even better though, you can use it for many occasions with slight adjustments.
Halloween 2020 is Going to be About Social Distancing Safety
If there really is a Trick-or-Treat night this year: Halloween 2020 is looking like it may shape up to be very different.
Here are just a few of the things that I have read:
https://apnews.com/9cb2ddf64055ceabdf89421bfd13dac0
People are wanting a semblance of something normal and to have a chance at fun. Kids are needing a good time.
Let’s face it 2020 has sucked and needs a do over. But it’s almost fall so let’s decide to do Halloween Trick-or-Treating this year a little “safer” for all of us.
What Items Will You Need to Make a DIY Sucker Pole?
Part 1: Pole of Project
- 4” PVC Pipe – Length / Height can vary. Mine was 5 foot.
- 48 oz – Empty Metal Coffee Can / gallon paint can
- Tape measure / yard stick / ruler – I used them all on this project.
- Bag of QuickCrete – preferably without gravel
- Spray Paint: 2 – 4 cans. Colors of choice. I used Black for pole. Gray primer for sign. Red & White (Could use for sign) – I used acrylics.
- Saw – We actually used a couple of different ones:
- Drill with variety of bit sizes
- Suckers
- Decorative items: Varies based on season/occasion
- Optional – lights, floral stems or other
Part 2: Sign
- Cricut: How I made stencil for letters
- Contact Paper
- Hot Glue Gun (possibly)
- Modge Podge
- 24” x 24” piece of paper for cutting a pattern
- Acrylic Paints (for sign If you choose to have one.)
- Thin plywood: Cut 24” x 27”
- Sandpaper: 150 grit
- Paint Brushes – Your preference
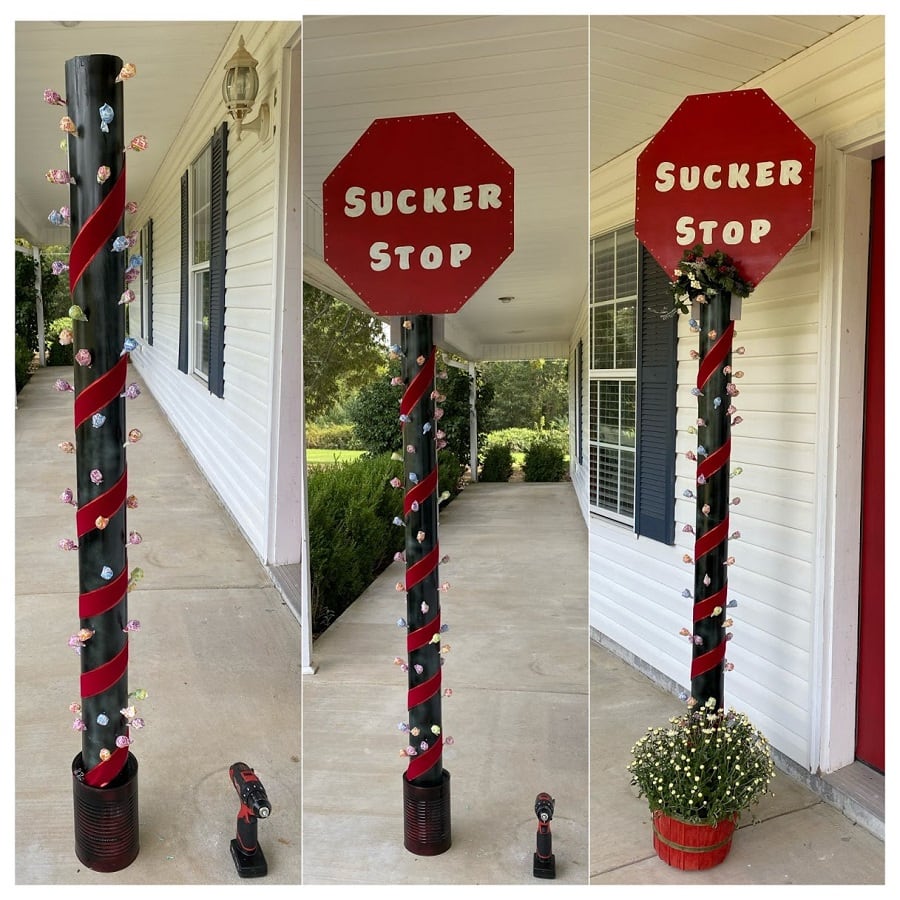
DIY Sucker Pole Assembly
You can go at this project anyway you want. It is just a few easy steps. Let’s talk pole set up. We want to keep this easy to make, move, store and assemble.
POLE:
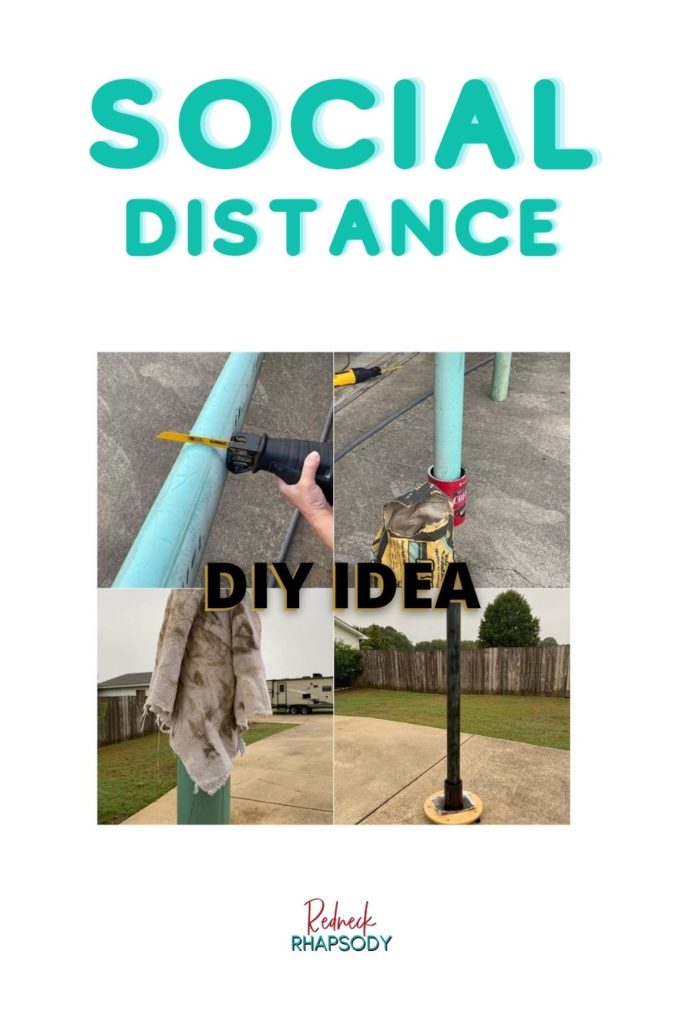
- Cut the 4” piece of PVC pipe to the desired height. I wanted to keep mine where it would fit up under my front porch. You will want to keep in mind that you may not need it over 3 – 4’ based on who you want to be reaching the suckers.
- Clean it to get excess plastic shaving and dirt off of it. I waited on this step until we had poured the quikrete and it had hardened. It will just have to be done at some point before you paint it or the paint will not adhere properly.
- Pour quickrete into a large coffee can or small bucket. We filled it a little over half way. Add water based on directions. We let our mixture get to pudding like stage/texture. (SCB isn’t the best with actually measuring this kind of stuff.) He just goes back and forth adding to get the consistency that he wants. I let him do this part so I could film it.
- Set your pole in it and let it dry.
- After at least 24 – 48 hrs, I then cleaned my pipe.
- Let dry completely before painting.
- Make sure you are far enough away from the house, vehicles or anything else before you start spray painting. Especially if the wind is blowing. Spray paint “over spray” does carry quite a distance, in case you haven’t worked with it before. I didn’t even use a whole can on this project, but I wasn’t painting it solid, nor with multiple coats.
- Let it dry completely.
- Next step will be to cut slates in the top to securely hold the sign, unless you decide to leave without a sign and possibly just add decorations in the top. Skip this step if you want to keep the project budget and easy factor down.
Signage for the DIY Sucker Pole:
- Cut the piece of plywood into a rectangle 24” x 27”. Sounds weird I know, but you will need the extra at the bottom of your sign to make it stay in your pole. Just bare with me it will make sense I promise.
- I lightly sanded the sides ( you will need to keep the sandpaper handy for later cuts.)
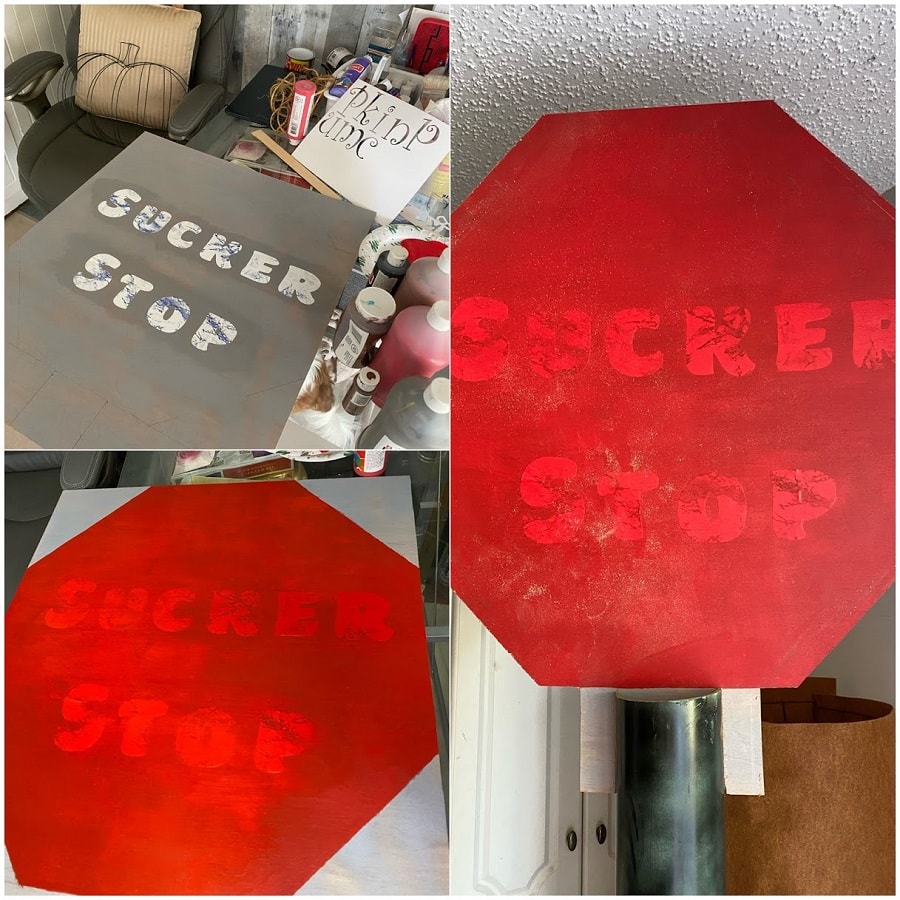
- Spray painted the entire board with gray primer.
- While drying I used this time to measure out the size and shape I wanted for my sign. (See details below on how I chose to make an EASY octagon shape for this project.)
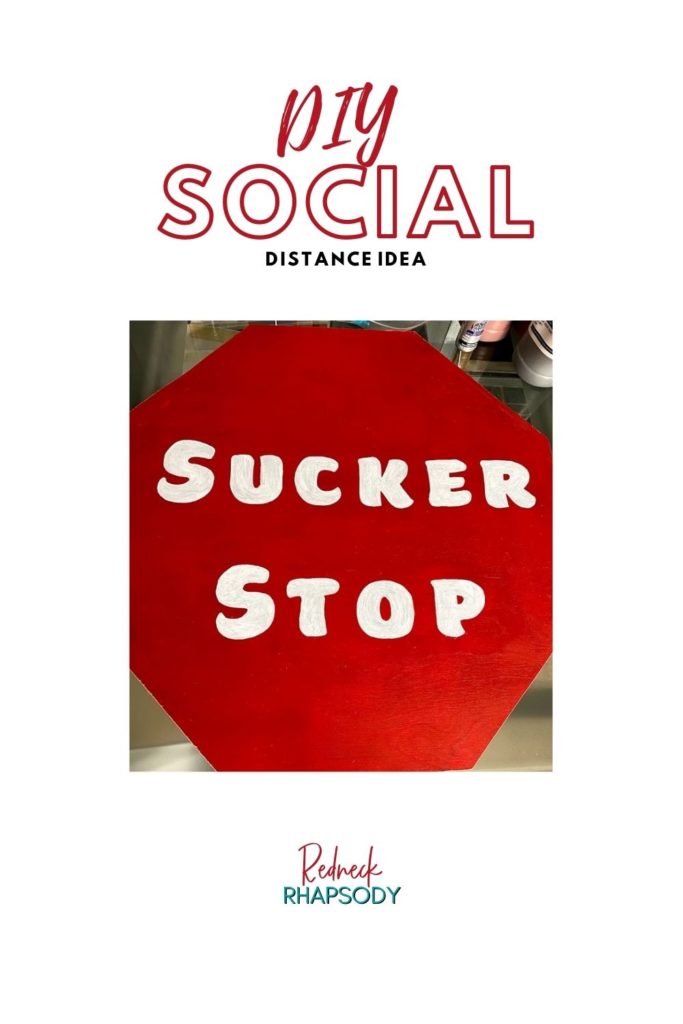
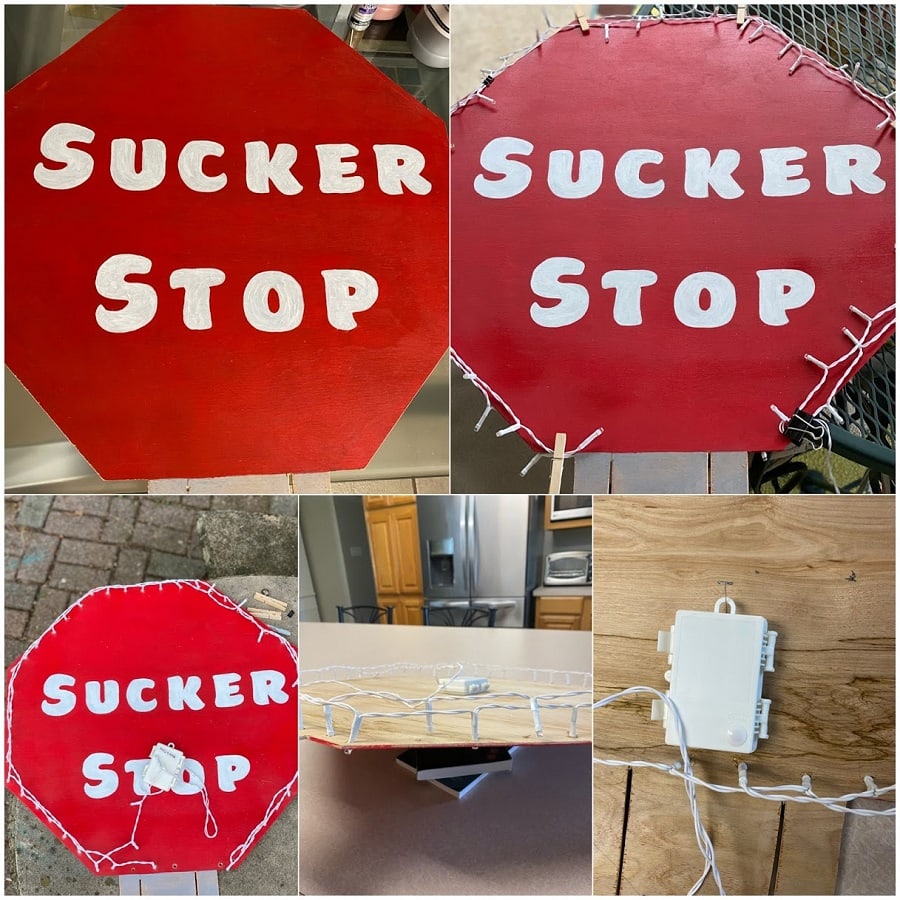
- Using the Cricut I cut out letters for the size that I wanted on my sign. Your size will be based on what you want yours to say, the font you choose, etc. Knowing that I want to not only paint them, yet drill holes and light them I wanted to keep my letters around the 3” size. I went with a Beefcakes font for this particular project. Keeping the wording simple: Sucker Stop. I did set them a little further apart than if I was just doing a painted sign or picture.
- Place the Dollar Store contact paper face up and do not mirror you cut.
- Should you not want to use acrylic paints, then you should spray one to two coats of white spray paint on your board at this time. Concentrate on the area where you have measured for your lettering if you want it to be white. Let each coat dry according to cans directions in between coats.
- When dried you can trace out the sign and base of sign pattern onto the board and make your final cuts. Hit those edges with the sandpaper before proceeding.
- Using a yardstick and a ruler I measured to get an equal distance from the sides of the sign to place the letters. I also used two ruler widths between the words for ample space of the vertical placement. (I wasn’t extremely OCD on the letters being perfect, but I didn’t want to just free form them either.)
- Peel and stick the letters down.
- My letters were not sticking well to the primed board, so I chose to put a coat of modge podge over them to hold them and give a layer of protection maybe where my red acrylic wouldn’t bleed under the edges. (If you’ve ever tried to paint white over red, you’ll know exactly why I did this step.) Yes, I could have painted the white first, but I didn’t so there ya go…
- Two coats of red acrylic, with dry time in between. Then two coats of white for letters.
- Details about the cuts and portion left for fitting in post are down below. I did hit all cuts with sandpaper after they were made to keep splinters at bay.
- Drilled holes for lights around the edges of the sign to light it up.
- Added them on the back.
- Secured them with hot glue here and there.
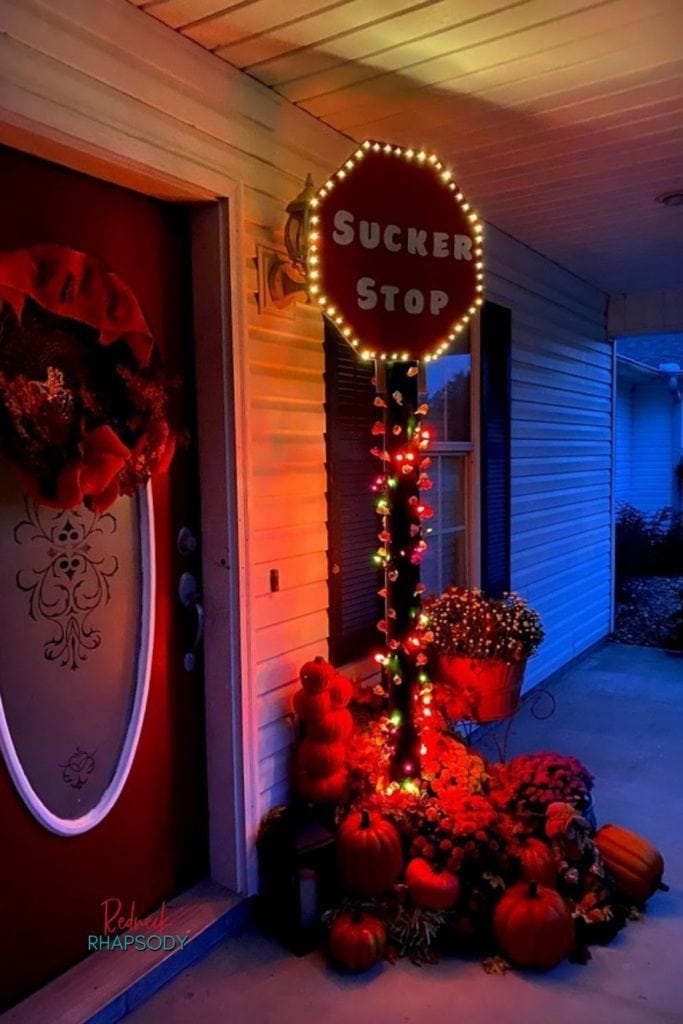
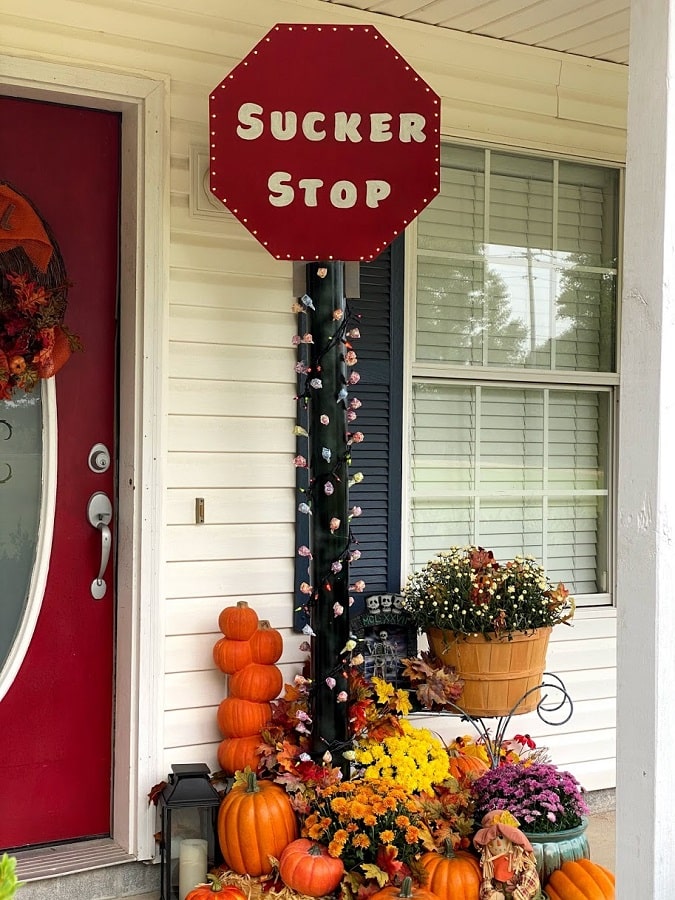
Assembly of Pole: Sign and ALL the Decor & Goodies
- Place the pole where I wanted to have it so trick-or-treaters would have accessibility, while still being able to plug in my lights. (Fairy lights on the sign were battery operated, but Halloween lights on the pole were not.)
- Put the sign on top of the pole. Taped battery pack for lights to back of sign where it would not weigh and pull on lights.
- Wrapped pole with lights.
- Added other seasonal decorations to top and bottom around the pole.
- Before Halloween you can place spooky or seasonal picks to the holes in the pole if you chose to have it up and in your display ahead of time.
- Then you add your suckers for Trick-or-Treaters. I would remove all the decorations from the actual holes when this time arrives.
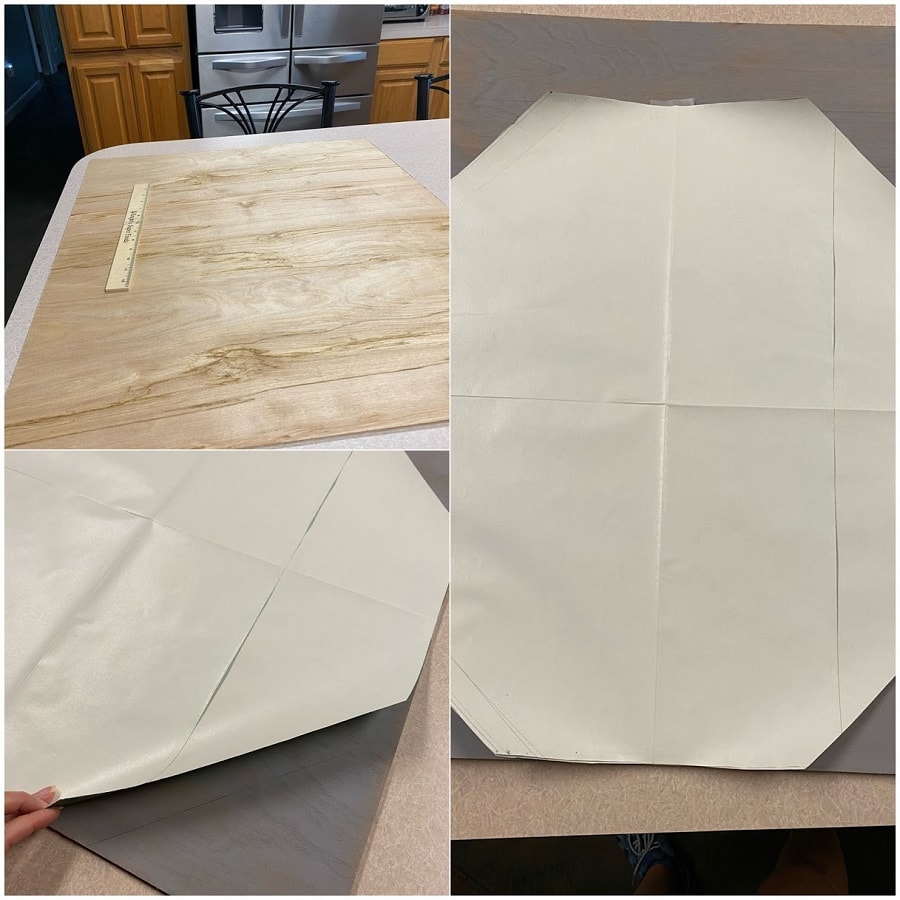
EASY way to make an octagon pattern for our DIY Sucker Stop Pole.
Just going to lay it out there y’all, I barely made a B in geometry. Not to mention that it was 9th grade when that class was required. That means I would NEVER have chosen that class to take.
Luckily Mr. Eberhart liked me or I am sure the grade could have been more like a D-. Sad thing is I have used the base of geometry for SO many regular things I do in life that I wish I would have made myself learn it more thoroughly.
Well knowledge of shape / angle is what was needed to make this project work. However, find an easy way to create an octagon anywhere. Not on Pintereset, YouTube or just Googling.
I took a roll of old wrapping paper. Measured it out to the size of the board. Best way to do this is lay the paper white side up, lay your board on top, pencil the edges and cut.
Take the paper fold in half then in half again. ALL sides of an octagon have to be the same length (well, they are supposed to be), I might have been off an 1/8th” or so (3mm ish) on a side or two.
Using the folded sides I measured 5” in from both of them. Made a pencil mark coming in from each of them. Then I drew a diagonal line across the unfolded or loose sides at 10”.
When unfolded each side would be 10”. Now cut away the pieces that are not connected by any of the folds.
(I really hope this makes sense or you at least watch the video, because this is awkward to write for someone to understand.) This may be why I could not find an easy way to make an octagon – because it’s octo weird to explain.
After cutting the pattern; I placed it on my wood and traced it for cutting. Shame on me for not doing this on the backside of my wood. Especially since I had already painted my red coats.
Repairs had to be made to the red after the final cuts were made. I am the perfect one to be the example of what not to do. Yes, I could have marked the front for letter alignment, but the back should have been marked for cuts…smh.
Securing the Sign for Pole
Let’s address the 3” space at the bottom. Cut it even with the bottom octagon (I actually cut mine in a little bit, your choice). I measured 4” across within that 3” leftover. Center it on the sign – 2” left, then 2” to the right.
After you mark it I highly suggest taking it to the pole, before you cut the slats. Sit the board up on top of the pole. Mark the exact spot where the pole hits it. You need it to slide down in that place for stability.
Also, don’t cut the width of the slats in the wood, nor the pole too wide or it will be loose. Make adjustments a little at a time. Possibly just using sandpaper on the wood to free up space for a tight fit.
We cut slats on the board first. Then used a hand saw to cut cross slats in the PVC pole. This let the wood slide firmly into the pole; interlocking them for a secure fit.
Finishing Touches on the Sign for the DIY Sucker Pole
Using battery operated lights; I wanted to run them around the edges of my sign to light it up. This step is not necessary, I just like lights!!!
I found the size drill bit I would need based on the size of lights. All the details of drilling holes are in the video.
I didn’t measure like I should have, but hey it worked out. I did secure them on the back of the sign in a few spots with a dab of hot glue. (Some spots were a little tight.)
Let’s Wrap this DIY Sucker Pole Project Up!
Literally, depending on the season or occasion you have so many choices. Let me just list a few:
- Halloween
- Christmas
- 4th of July
- Birthday Parties
- Wedding / Wedding Shower
- Baby Shower
- Gender Reveal Party
- St. Patrick’s Day
- Valentine’s Day
- Teacher’s Reward Sucker Stop
Whichever occasion you use it for its easy to decorate, paint, repaint or cover in paper and ribbons, for said event. Dollar Tree makes it easy to shop for Halloween: Candy & Decorations! Cheers to Halloween Fun! Shop Dollar Tree for Spooky Décor!
Halloween DIY Sucker Pole is for Safe Trick-or-Treating 2020!
However, I am going to use mine right now for a social distancing safe Trick or Treat solution. Wrapping in Halloween festive lights. Then drilling holes in my pole is the pattern that I will follow.
Should you want no pattern for lights or ribbon ever, then maybe just placing the holes for the suckers at random will be how you choose to do yours.
Absolutely, no right or wrong. Just make sure the drill bit you use isn’t too much bigger than the circumference of your sucker stem, yet is large enough that they can easily be taken in and out.
Drill holes from up positions with a slight downward slant so the suckers won’t fall out. I should have laid my pole on the ground before starting to drill. It was much easier doing it like that.

Yes, I had done the majority with it NOT on the ground… Just don’t put undue pressure on the concrete and base if it’s at an angle. It might not be as secure.
You might have to buy the suckers you want to use, based on the width of your pole. In other words you can’t use a sucker with an 8” stem in a 4” wide PVC pipe.
That does leave for a whole nother realm of exactly how you could use this idea though. Maybe an 8” or 12” PVC pipe in a 5 gallon bucket with great big lollipops in it… The possibilities are endless!
***ADVICE*** Secure the pole if you can at all. I would suggest strapping to a post if at all possible. It tends to be top heavy…(Yep, yet again what NOT to do.)
Just think about how easy this project was. Cost was minimal, especially if you have left over stuff from other projects. Easy to store standing or laying down. Handy to put up for multiple occasions.
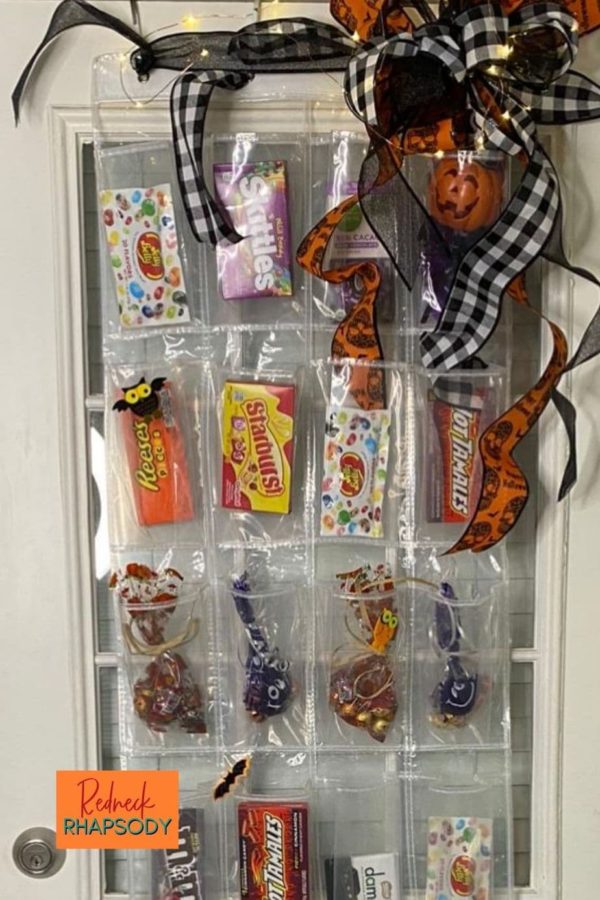
Here are a of my ideas for a socially safe Halloween Trick or Treat method!
Check them out: Over the Door Pocket Hanger Bag!

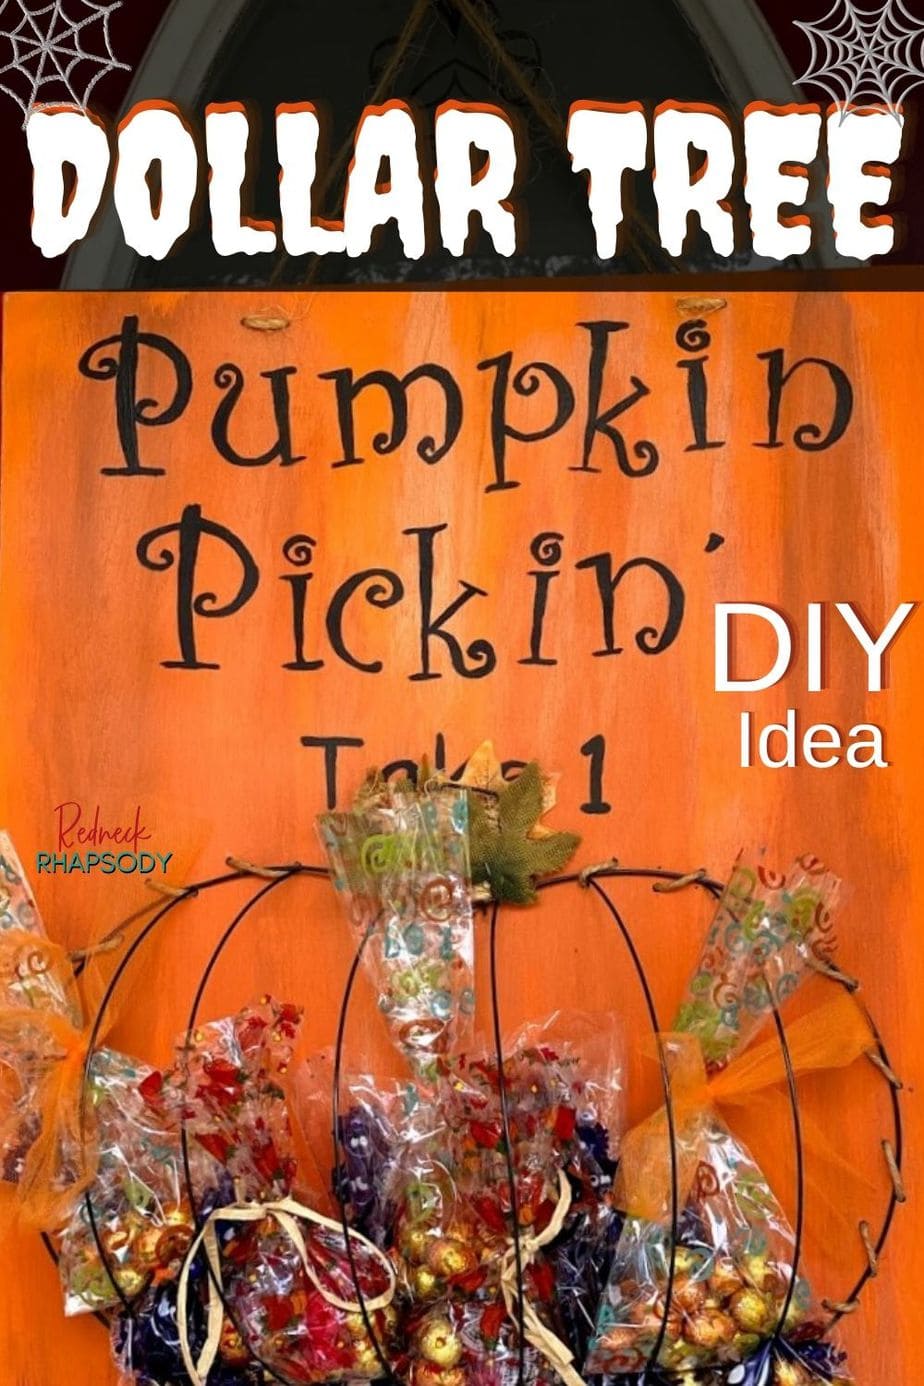
Dollar Tree Pumpkin Pickin’
Have fun & enjoy however you decide to use this at your home or business. Now, grab a lawn chair and “cop a squat” at least 6 feet down from the door. This way you can enjoy the little characters that come to visit.


4 thoughts on “How to Make a DIY Sucker Pole: Social Safety for Halloween”